Showing posts with label Concrete Slab. Show all posts

Saturday, July 23, 2011

Getting Ready for 3Aqdeh

The final preparations for the 3Aqdeh are under way. We've completed our first phase of insulation and fill import around the basement floor, set up the Hollow Concrete Blocks (HCB) on top of the roof / floor forms, and distributed the steel reinforcement bars along the beams, tie beams and ribs to reinforce the slab. 

We've also completed coordination with the electrical contractor and the plumbing contractor to set up the necessary sleeves that will allow them to pull their wires / pipes through the slab after the 3Aqdeh pour.

Below you can see photos of the fill being imported and distributed. We placed the fill on both sides of the retaining wall in order to maintain the neutral loading it was designed for, and filled only about 1 meter behind the second basement wall in order to establish a ground elevation suitable for setting up the insulation layer. This layer is composed of a 2-cm thick styrofoam board that is protected by a wall of thin (10-cm) concrete blocks, which required the fill underneath to act as a foundation for the insulation wall:

(truck importing fill material)
(fill being imported by the truck on one side and distributed by the bulldozer on the other)
(fill delivered at the top of the future street to be pushed behind the wall) 
(bulldozer spreading the fill material)

Additionally, we ordered around 1,800 Hollow Concrete Blocks (HCB) that will make up the majority of the floor slab, and the crew distributed the blocks in accordance to the structural engineering plans. The blocks sit directly on top of the wood forms, and they are separated in order to place reinforcing steel beams and ribs between them to support the slab structure after the concrete is poured and the forms are removed. Progress pictures, as well as some detail work below: 

(HCB delivered)
(HCB distributions in progress)
(three-quarters of the roof area completed)
(final blocks in place, ready for steel)
(beam reinforcement between HCB's, as well as inverted beam forms shown)
(the inverted beam forms were tricky because they need to "float" to allow concrete underneath)
(sunken slab area doesn't have HCB, to allow for pipes to be set up under future bathrooms)
(beams and tie beams need to have all the steel tied together by hand, one bar at a time)

(final preparations for the concrete pour)

Finally, I wanted to post some photos showing the form and reinforced steel construction details for the staircase because it's always been difficult for me to picture how it's done. I now have a chance to see it as a work in progress and it's helped me understand what goes on. Please feel free to post a comment if you have any questions about the photos below and I'll be happy to elaborate on them:

(forms are built like a slide, then reinforcing steel in set in place.
Notice the faint outline of the stairs drawn in red marker on the wall to the left)
(after steel is complete, horizontal forms are added that allow concrete to flow underneath them)
(detail of the stair forms. All forms are fixed to the wall as well as to each other)
(steel from the top of the stoop reinforcement goes to the bottom of the stairs and vice-versa)
(reinforcement bars protruding to set up for the next level of stairs)
Next up, our first 3Aqdeh or roof/slab concrete pour that will complete the 3Adem (bones) phase of the second basement floor.


Saturday, June 18, 2011

Slab

After many weeks of work on the foundation, we finally poured the slab and the building has taken shape. It's a substantial milestone, and it was fun to watch everyone's energy pick up to try and get ready for the pour including the plumbing and electrical subcontractors.

Below you'll see photos of the crew preparing the forms for the final Ground Beams, placing the reinforcing steel, and spreading the remaining fill evenly over the rectangular pads remaining in between the Ground Beams. After that, they spread plastic sheets over the fill as a moisture barrier, then placed a steel grid (8 mm thickness, in 20-centimeter square grid openings) over the plastic as reinforcement for the concrete slab.

You'll also see the plumbing sub placing his wastewater pipes that have to go under the slab in place, and the electrical sub placing his high and low-voltage conduits and sleeves under the fill material to establish his routes under the slab.

(crew and subcontractors working)

(plumber setting up the WW drain for a future toilet)
(plastic sheets being placed over the smooth fill and WW pipes)

(final pads remaining are being worked on by the electrical sub)

(at the end of the day, awaiting the concrete pump truck next morning)
The pour went smoothly, and included approximately 50 cubic meters of concrete for the Ground Beam and slab (the 10-centimeter-thick slab took around 35 cubic meters while the Ground Beams took up another 15 or so cubic meters). We also poured the third phase of the reinforced concrete retaining wall along the front (north) boundary, completing the first 3-meter-high run along the entire 30-meter stretch of street frontage. The retaining wall took another 13 cubic meters to complete, bringing the total for the wall so far to around 90 cubic meters.

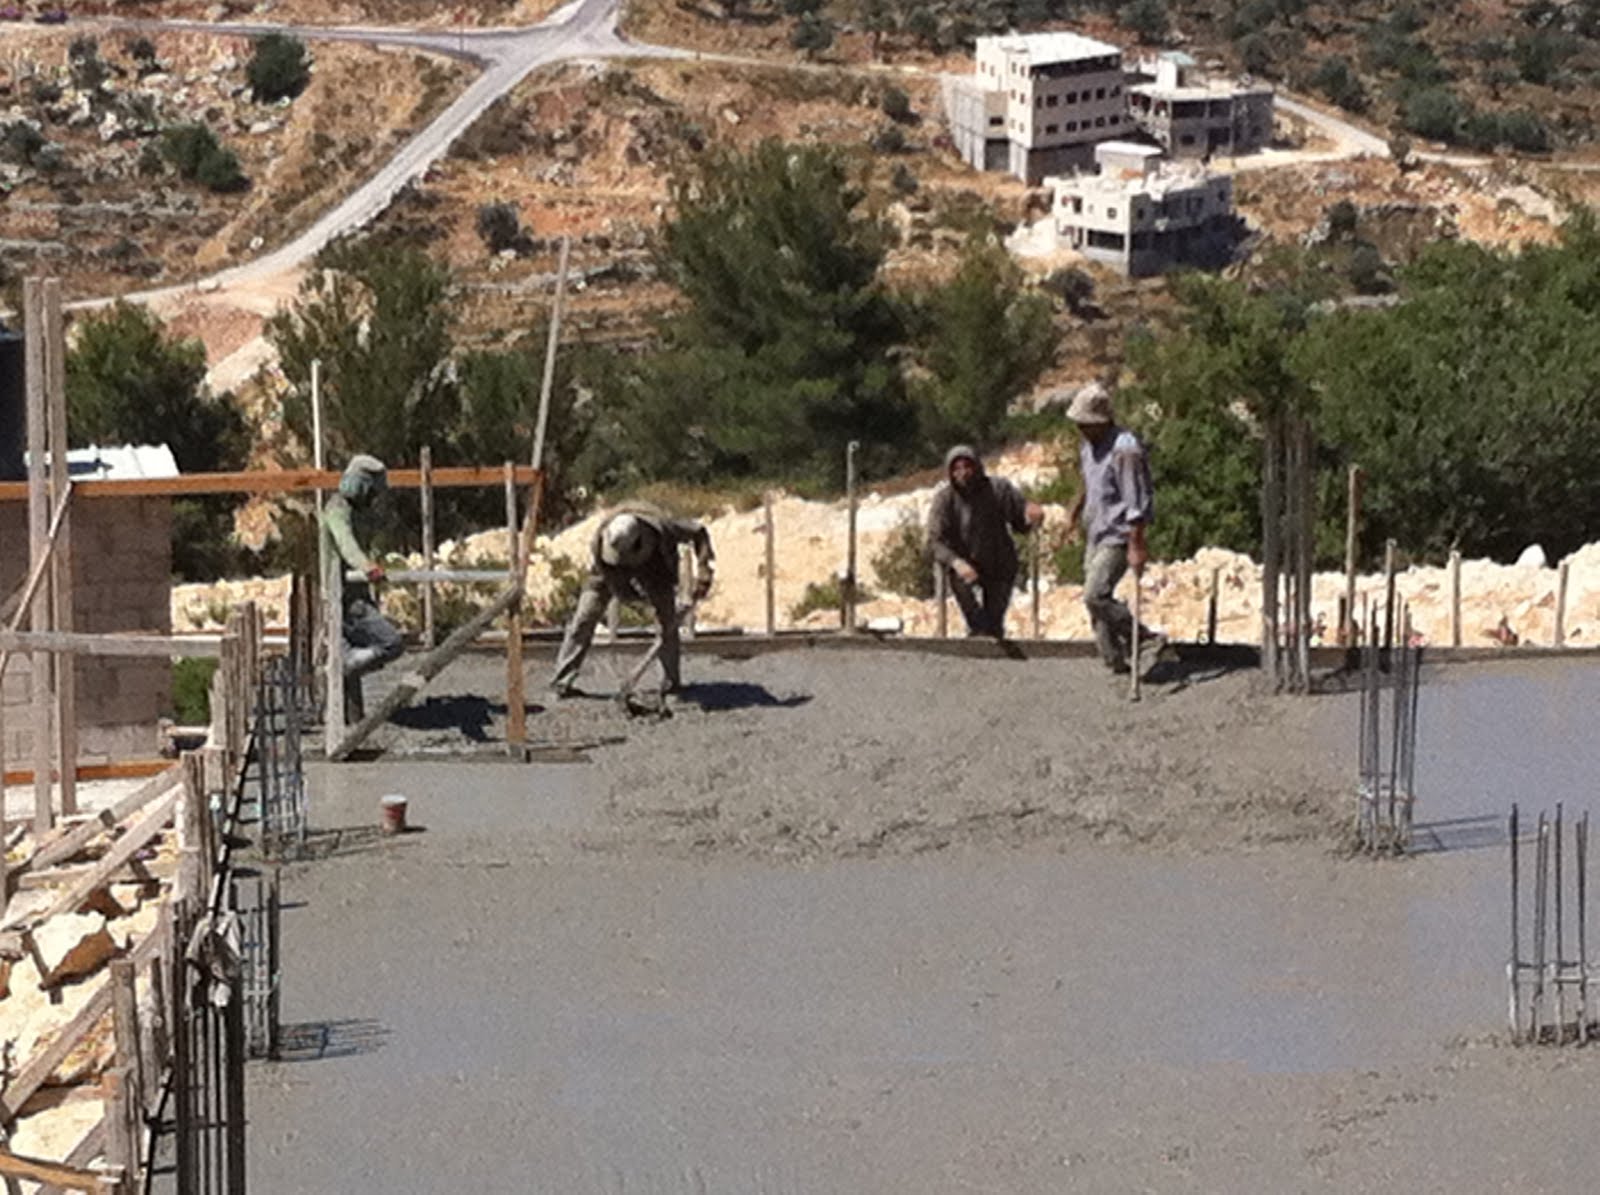
Th crew used hand shovels to spread the last of the concrete evenly over the slab, and a make-shift level spreader to smooth the surface (as seen in the first two photos below):

(using the level-spreader to smooth the concrete)
(using shovels to spread the concrete evenly)
(close-up of the finished product)
(the building takes shape)
(retaining wall shown in foreground)
(the view from the street)
Next phase will bring forming of the walls for the second basement level, ordering reinforcement steel and the new (for me) process of placing an order for the stone facade and overseeing that aspect of the construction work.